Sunday, November 3, 2013

Destructo's "Garage" Bedroom REVEAL!!

I've been meaning to post Destructo's room reveal for quite a while and finally decided  that I better go ahead and stop procrastinating and get it done today, so here you go:

The story of Destructo's bedroom makeover.

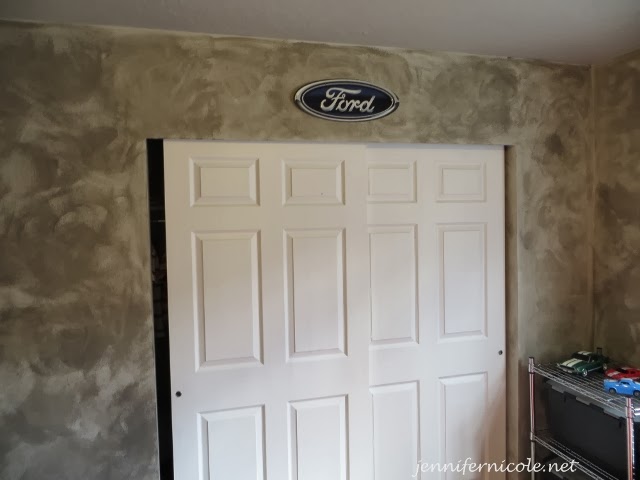
If you haven't noticed already this house is infected with the color beige, which I consider to be far too boring so, of course, the first thing I had to do in the room transformation was to turn the yucky beige walls into walls that resembled a garage. 

I wanted the "garage"walls to have the "look" of cement with some texture to add interest to them, so I picked up two cans of flat paint, one in light gray and one in dark gray, from  Sherwin Williams along with glaze which I had tinted with black. Then I went over to Lowes and picked up some venetian plaster and this little spatula thingy:


I thought it would be a pretty easy thing to do, but there were a few little issues that I had to deal with:

 Fail #1: After watching a few "how-to" videos on YouTube, I realized that venetian plaster was going to take way too long and decided to take it back. I did not want to re-experience the P.I.A.of Diva's Polka Dot bedroom EVER AGAIN.

Fail #2: Instead of the venetian plaster, I got this great idea (again,from YouTube) to buy tissue paper to create the texture I wanted, which I planned on putting on the walls and then painting over. 


However, once again, I realized that there were some issues that I hadn't taken into consideration. 

1.The tissue paper was even messier than I thought it would be (which is usually the case, though).
2. The tissue paper kept ripping all over the place and wouldn't stick to the walls in the way I wanted it to.
3. Studly reminded me that we were still renting and that maybe this was not going to be seen as very cool by our landlord, who had given us permission to paint, but not to go all "Jen-Style" with it.


(Yes, I swore like a sailer during this failed attempt.)

So, after two fails, I decided to go with a 3rd option:

I painted the walls with the lighter flat gray paint and then mixed the tinted black glaze with the darker shade of gray. I couldn't remember the ratio the guy at Sherwin Williams told me to use (Okay, I probably wasn't listening too closely when he told me...) so, I just kind of eye-balled it...because I'm super detail-oriented, like that.

When I applied the glaze, I tried a couple of methods in order  to get the textured look. First, I used rags, but the glaze dried too fast on them, making it hard to "blend in" with the wall paint. Then, I decided to use plastic bags, because I've learned from previous experience  that paint does not dry very fast on plastic bags. This method worked a lot better (and a lot faster) for me and soon the walls began to look like this:


I noticed after I was finally finished with the walls that the white baseboards were a little too stark against them, so I went ahead and painted those black. I wanted to paint the bedroom side of his door and the closet doors,too, but Studly convinced me that I probably shouldn't ( Dang him and his practical mind!).


I also changed out the outlet covers and found this really cool light switch cover (which was entirely too expensive, but I just couldn't resist):


The next part was constructing the garage door that I had pictured in my mind for the last couple of years  for his room, which you can read about here.


 After I was finally finished with the painting and the garage door had been assembled, it was time to find a new bed for him. His first bed was one of those Little Tykes toddler size car beds, and he was totally heartbroken when he grew out of it, so I decided to see if I could find him a twin size one and thanks to the magical workings of  KSL (what most people here use instead of Craigslist). I found one for pretty cheap and we went and picked it up.

After that, it was time to find some storage solutions for his 92 billion toys. I found a toolbox at Lowes that I really liked that could be used as a toy box:


Then, I remembered the lovely sibling rivalry that exists in this family and realized that there was a strong possibility that one of them could end up locking the other one in the "toy box" and nixed the idea. 

Instead, I went with the alternative solution of wire garage style shelving and these bins:


Destructo did already have one of those cubical storage units to use for storage as well, but the problem was that it was the maple color and the bins didn't match the new colors of the room, which didn't really work for me. I was going to sell it and get another unit in a different color, but then Diva asked if she could decorate it with duct tape. Being the cool mom that I am, I threw caution to the wind and told her she could. I figured that it was probably going to end up in disaster, but I wanted to give her the opportunity to express her creative side. 

I'll admit, I totally underestimated her:


She used silver duct tape for the insides and front edges, black and red stripes on the sides and then did a checkerboard pattern in black and white on the top. I personally think she did a pretty awesome job!


The next piece of furniture to go in the room was the dresser that I had redone, which you can read about in this post:


After the furniture was in place, it was time to accessorize:

First, we had to make sure this included a picture of his own daddy's car:


Then, we used a bunch of tin Mustang signs from his room in one of our other houses, so I used those along with a couple more and  a lamp I found at Hobby Lobby and a metal figurine of the running pony, (which if dropped on your toe, really freakin' hurts!):


 ...and now, for the best part of the blog post: The Before and After shots!  

Goodbye, ugly beige!


Hello,  Jr. Mustang fan's little piece of heaven (on a budget)!


The shelf on top of the dresser still needs to be hung...

My favorite part of the room is the poster you see above, though. It may seem like an ordinary poster, but it holds a very special meaning for our family. In fact,  I'm actually getting pretty teary as I am writing this part of the post. 

As you can see, the poster (which I'm sure Studly would like you to know is in commemoration of the 35th anniversary of the Mustang.) has several signatures sprawled all over it. These signatures, are from all of the members of our Mustang club who were part of the club back then.


 However, it is one signature in particular that makes this poster so special:


The signature is our friend John's, who was a founding member of our Mustang club and a great friend, who passed away last year due to cancer. He was a genuinely nice guy, who was also a great husband and father and we feel so lucky to have known him. We miss him and his "signature style" of  long-sleeve tee shirt and shorts all of the time and hope he's up there doing some wicked burnouts in some tricked out Mustang as we speak (although it's probably more like 12 in his case).

Saturday, October 19, 2013

DIY Makeup Palette Organizer

One thing that I've learned as I've collected eye shadows over the years is that using individual eyeshadow pots sucks. It seems like you are always wasting time looking for the colors you need and If you're like me and seem to have an issue with putting things away after you use them because you are constantly running late, they also end up taking over your vanity. About a year ago, I had finally had enough and transferred most of my individual shadows into empty palettes (The kind I have are called Zpalettes) so I could organize them with my other palettes. However, this also seemed to create a problem with organization. Originally, I just piled them into a basket on my vanity. However, because they are all different sizes, I couldn't keep it organized either without forgetting about some of my smaller ones. 

I looked into getting some acrylic organizers, but they can be pretty expensive, so I decided to use stationary organizers to organize them. This also ended up being too expensive though, because I was going to have to buy a few of them in order to get all of my palettes organized. 

Instead, I decided to troll around the kitchen and bath organization aisles around Target and found this:

It was just a simple lid rack for the kitchen. It had plenty of spaces for my palettes and it was pretty cheap, too. I took it home, spray painted it with some left over Krylon "Pistachio" (I think that was the color.) and put it to work:

  Voila!

Not only does it hold a lot of my larger palettes, but it also keeps my favorite ones within reach and my smaller palettes have a little more space in their basket, too.

The only drawback is that I don't get to experience "Christmas Morning" every time I find a long lost shadow or palette anymore, which is kind of a bummer...
 

 FYI: For anyone who wants to know what palettes these are (from front to back):  Urban Decay "Smoked", Lorac "Pro Palette", Urban Decay "Naked", Urban Decay "Naked 2", The Balm "Nude'tude", Cargo "Vintage Escape", Urban Decay "Vice 2", and the black and white zebra one is my Zpalette with my MAC shadows.


Friday, September 6, 2013

Destructo's "Garage" Bedroom Pt 2: The Garage Door

Before I reveal the entire room, I thought I would give the garage door in Destructo's room its own little post in order to explain the process of how we built it a little better, so here we go:

When I finally figured out that I wanted to make Destructo's garage room look like an actual garage, I knew that in order to make it look like a garage, we would need the one essential thing that all garages have...a garage door.

So, off I went down the aisles of Lowe's again in search of the material I was going to use. As I passed through the back aisle, I took a long look at the service garage and realized that I had just passed the perfect "garage door" material. It was the corrugated metal sheets that were in the roofing section:


Of course, I thought I was pretty much a genius for coming up with this totally unique idea all on my own, until I found a few google images and realized I wasn't the only one.

{Why does this always seem to happen to our best ideas?}

Anyway, aside from the corrugated metal, we also purchased the metal tracks alongside it, in order to keep the sharp edges from sticking out on the sides and then wood "spacers" so it didn't sit directly on the wall, leaving huge gaps and not fitting in the tracks correctly.

We needed 3 sheets in order to make the door work on the wall and each sheet needed to be cut down in order to fit on the wall. For this, we used tin snips...and there was only a little blood shed (corrugated metal can slice like a razor blade.)

Assembling the door was pretty easy. First, we drilled the wood spacers onto the wall:


Then it was time to fit the metal sheets over the spacers and drill them into the spacers:


After we finished with that, we attached the tracks onto the walls, which I had spray painted the same color as Destructo's dresser, and crammed fit the edges of the metal into the tracks.


You can get a better idea of how we assembled it at the bottom of the picture:


It was coming together quite nicely. 

But, there was one last thing we needed to do to finish it off, and that was to create the "roller" at the top of the door. We ended up using a 5 inch heating duct, which was already the length that we needed, and 6 inch caps for the ends. I wanted to spray paint that red, too but apparently, that would be too unrealistic (said the guy that has worked in a warehouse for almost 20 years...) 


 ...and here's the car, parked safely in its garage!


Wednesday, September 4, 2013

Destructo's "Garage" Bedroom Pt. 1: The Dresser


(This is part one, of my three part post on Destructo's bedroom re-do.)

As some of you know, we have been working on Destructo's bedroom for several a few months now and I am pleased to report that it's finally done! We decided on a car themed bedroom, but not just any car, it needed to be a Mustang car bedroom.

Why would we "customize" his room to be solely Mustang territory, instead of just cars in general? Well, If you don't already know, Studly not only loves cars, but he eats, sleeps and dreams them. He especially loves Ford Mustangs. Fortunately for him, Destructo has inherited some of that same love for cars. Thus, this is the 3rd of three car themed bedrooms, and the 2nd of Mustang themed bedrooms. However, I have to say I love this one the most, which is good because it definitely took the most work!

I'd have to say that one of my favorite pieces in the room is his dresser.

Originally, I wanted to get an actual Craftsman Tool chest, like the one that Studly has in the garage:


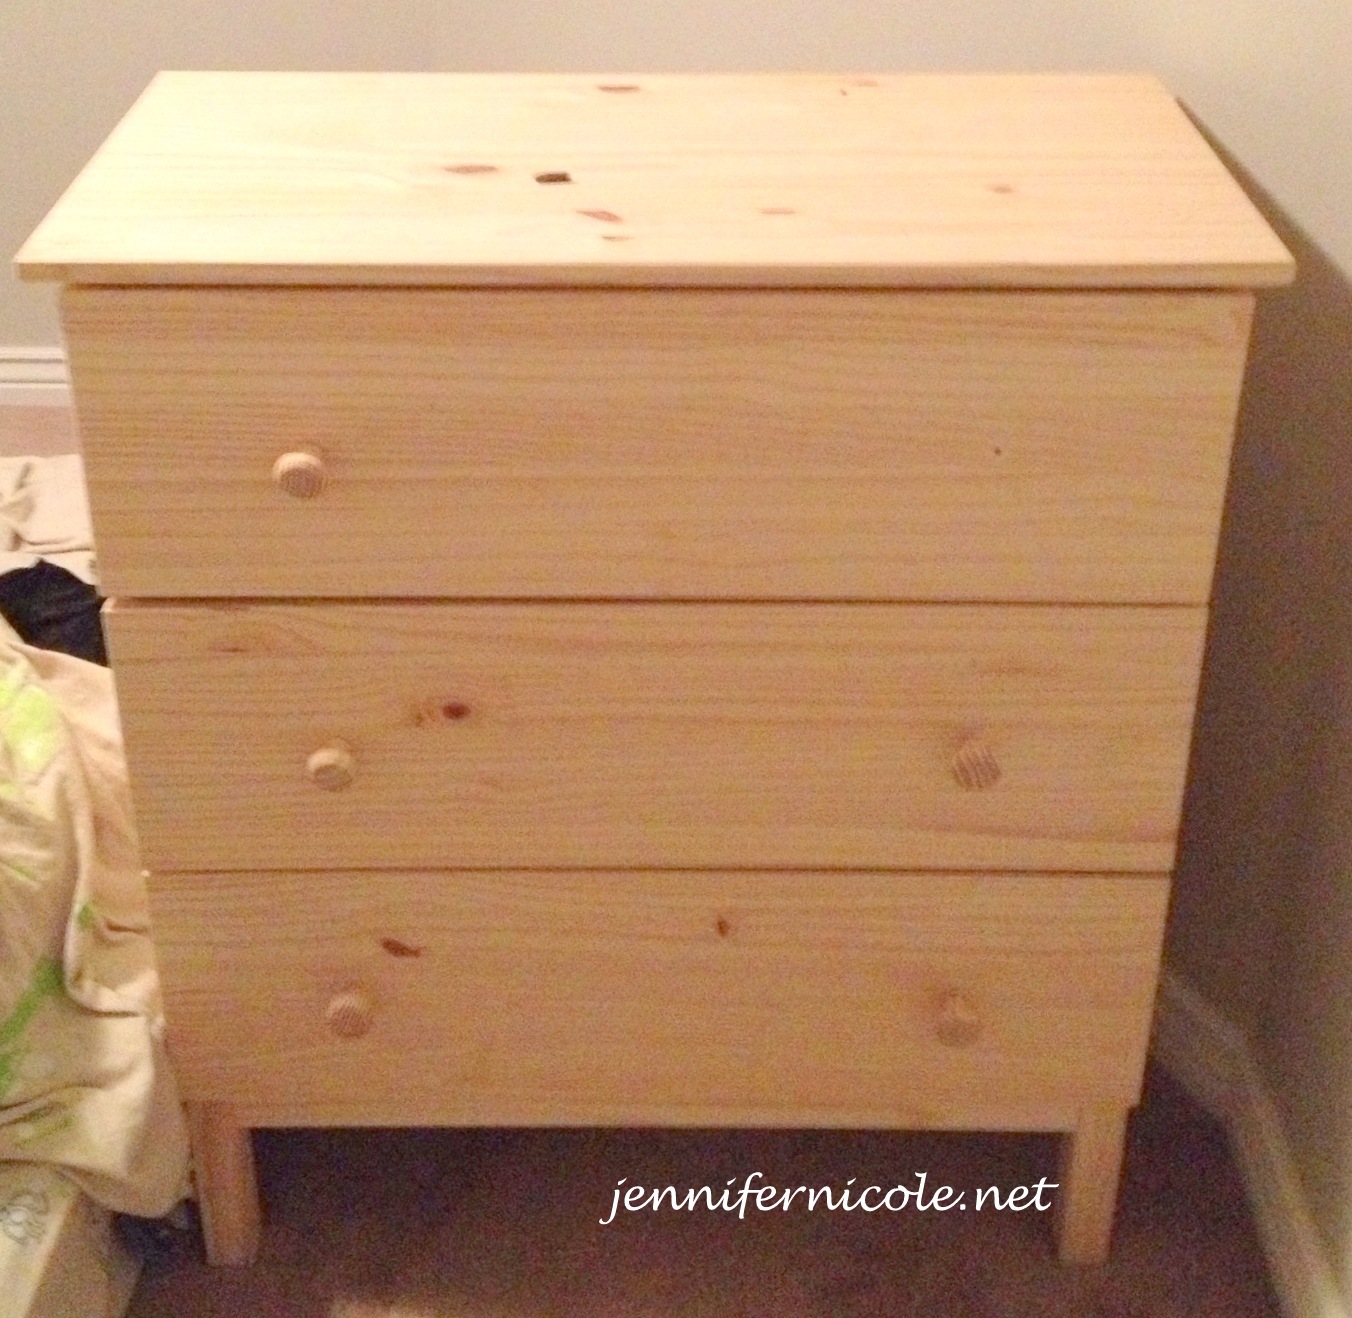
However, that was definitely NOT in our budget, so I had to get him this dresser, instead:

Sure, I had already removed a knob, but at least I remembered to get a "before" pic, right?


 It was an Ikea "Tarva" Dresser for about $80 and didn't exactly say, "Hey, I totally go with a car themed bedroom!", so I had to fix that.

First, I took off the knobs and puttied the holes then sanded, puttied, and sanded some more.

I

After I got done with that, it sat for a week I got right to work and spray painted it with some primer and then Rustoleum "Apple Red" in a gloss finish.

The next thing I had to tackle was the "handles". At first I was going to use these handles from Lowes:


However, they were pretty expensive and didn't give the dresser a very authentic look, so I had to look for something else that I could use and I finally found it after walking up and down almost every aisle in search for anything that resembled the "handles" you see on the tool chests. I found it in the flooring section. It was a simple aluminum flooring threshold that fit the profile I needed perfectly. It was also just over $1, which made it even better! I picked up three of them and went on my merry way.


The "thresholds" were about 3 feet in length, so we just cut them to the length of the drawers with some wire cutters and then I spray painted them black. We also wrapped a little duct tape around the ends of them being that they were aluminum and the edges were still sharp enough that I was worried about someone cutting themselves on them. Then, we just screwed them on. It was pretty simple and it gave the "look" that I wanted.

I take such great pictures of shadows.
 The dresser was starting to come together, but we still had to do a couple more things to make it look as much like a tool chest as possible. Mainly, we needed that "Craftsman" badge that you see on all of their tool chests, which I found one on eBay for about $8.


After we got the badge on, we only had one final thing to do, and that was to saw off the legs of the dresser and replace them with casters, just like we had done on the ottoman.


...and that was it!

It was probably one of the easiest and cheapest projects I have ever done!

"Move your butt, Harley!" (She likes to photo bomb)
Here are a couple more pictures sans dog butt:


 I can't wait to show you the rest of the room, including the coolest wall treatment that I have ever done!

Tuesday, September 3, 2013

From Desk to Vanity

Hi, remember me?...
Now, why would anyone give me away??

...that ugly desk that Jen bought from the thrift store for $25 when there was still snow on the ground and said she was going to turn it into something beautiful? Well, she finally did and here is the long awaited blog post all about the excitement, the heart ache, the near mental breakdowns and the sweet, sweet joy of finally getting a project finished after several months.

 Originally, I planned to still use it as a desk and refinish it for our office, but then I realized that I had a major problem:

...and that wasn't even half of it. 

My makeup, skincare, and hair products had taken over my bathroom, and quite frankly it was getting to be a pain in the ass to move everything constantly to clean the sink. Not only that, but I could never find what I needed. I was constantly looking for primer, or foundation, or anything else related to girly primping.

...and I had always wanted a vanity...

I got to work right away (okay, it was a few months after we unloaded it into the garage.)

One of the first things I had to fix was the veneer that had chipped on the top.


I took a stiff putty knife and shoved it under the veneer and started prying pieces off:


 It was actually a great stress reliever, but after a few dozen pieces flew up at me, I remembered that I liked seeing out of my eyes and so I got my safety glass and continued to rip up the veneer:


 At this point, I realized that I hadn't really thought ahead about what I would replace the top with, but I decided to worry about that another day and began working on the drawers and the fabulous hardware they came with:


After, I had taken off the hardware and puttied the holes, I primed the entire desk with Kilz Oil-based Primer. Then, I used a homemade chalk paint recipe that I had found online and mixed some gray paint left over from Destructo's room and a pink shade of paint that Lowe's had samples of. I ended up deciding to paint the drawers pink and the rest of the body the light gray. After I did that, I took black acrylic paint and swiped it wherever I felt like:

After that was done, I put another coat of the chalk paint over the drawers and desk and then sanded them down a bit. The drawers didn't look quite how I wanted them to, so I put a coat of the gray paint on them, and then painted them again with the pink paint before sanding them down. I also applied just a little of Valspar antiquing glaze in a few spots on the desk. I was going for a shabby chic look, but I didn't want to be too obvious.

I found some adorable knobs at Hobby Lobby that fit my shabby chic theme and had Studly attach them (He is a little more precise then I am at measuring.). I also replaced the feet because the other ones just didn't do it justice...and they were also ugly.

It was definitely starting to look damn good, if I do say so myself (and I do.)

 However, with every project there is a snag and mine was the top of the vanity as I still hadn't figured out what to do with it. I didn't want to put new veneer on it, because the online tutorials looked like there would be too many steps to follow and since I couldn't even finish the YouTube video explanations without falling asleep, I passed. I thought about mod podging scrapbook paper onto the top like I had seen on Pinterest, but I couldn't find a pattern that I liked. Then, I thought about fabric instead, but when I cut the fabric, I kind of destroyed it and so that was out, too. For about a week, I stared at the ugly particle board top, out of ideas (that wouldn't be too much work.)

Then, one day Diva started talking about how she learned how to make stuff out of duct tape in one of her classes at school and asked if she could duct tape a nightstand that we had handed down to her. After seeing the results, a light bulb went off in my brain.

"Duct tape!", I told Studly as I opened the shopping bag that night.
"What the hell for?"
"My vanity top, silly! We are going to duct tape it!"

He looked at me like I lost my mind, but he listened to my idea anyway and helped me duct tape away.


It took a roll and a half of white duct tape to finish it off:


My favorite part is that it kind of looks like wood planks, which is an idea that I had earlier, but had scratched thinking about the work required to seal it and how sucky it would be to clean between the planks
(Remember people, I'm all about convenience.)

A mirror was the next step. 
Luckily, I already had one that I had recycled twice before: 


The first "recycle" was when I painted my very first piece of furniture, which is what started this whole thing.

The second time, was as part of the Christmas display over my mantel last Christmas, when I took the side mirrors off, removed the glass out of each of them and replaced it with chicken wire, Santa, and a Merry Christmas!
 Luckily, I had kept the glass...Just in case I needed it again.

This happened to be the "just in case" project. So, after finding all of the parts to the mirror, I put the glass back in the side mirrors and repainted them to match the dresser. However, there was just one minor setback that happened when I was stapling the backs back on:

 Whoopsie!

Not to worry, like most of my other projects, disaster seemed to spur creativity in me and I soon came up with an alternate idea for that side mirror.

Instead of a mirror, it became a necklace rack. All I had to do was put some fabric over the cardboard that was supposed to cushion the glass from breaking (a job it obviously did not do) and then I just used spray adhesive (which smells quite flammable) to attach it before placing those handy little command hooks in random spots all over it:

Well, isn't he funny after midnight?


 After everything else was done, I took my trusty hot glue gun and added a little something to the edges of my new vanity.
I think I almost passed out when I saw the finished project. Mostly because I couldn't believe it was finally finished!

Anyway, let's get to the before and afters, shall we?


 ...and a few more pictures, just for fun and giggles:


The vanity stool is from Target. I had wanted it for several months, but didn't want to spend the original price which I believe was around $100 and even the reduced the price to around $60 was too high. So, when I saw it for under $18, I was like, "SOLD!" I think it's perfect, don't you?

This is the only time that you will be able to see this much surface..
(It doesn't exactly say Shabby Chic, but 5 Daytime light bulbs definitely helps you see that zit you need to pop.)

(...and when that zit needs special attention, we have a back up.)
Diet Coke: The Decor that goes with anything.

One more before and after shot?
Well, okay...


Well, that's it for now. I've got to go use this thing to make some magic happen for this face, run some errands, and then do my statistics homework (jealous?).

(Oh, and I also have to finish up taking pictures of my other project that I've been working on....Stay tuned.)