So...there's this ottoman that I've been reupholstering....Seems pretty simple, right? Like maybe it would take just a few hours?
Nope, not for this idiot.
But, we'll start at the beginning of the story:
It all started when I saw this at my sister's house:
I totally loved it and in a delusional state of mind felt sort of confident I could totally make it look more like this:
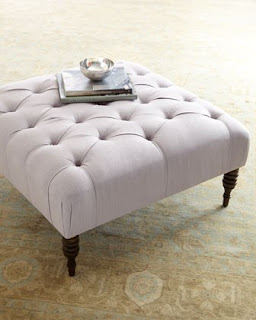 |
| "Nancy" tufted ottoman by Horchow |
It couldn't be that hard to reupholster it and redo the tufting, right? It already had the holes pre-drilled and so it would be easy to figure out where I needed to guide the needle in order to fasten the buttons on. I mean, I took about 5 seconds to scan another DIY bloggers instructions researched and read a bunch of tutorials on how to do tufting, and it really didn't seem that difficult. I figured I could pull it off.
I already knew what fabric I was going to use to reupholster it, too. I had gotten about 2 yards of this beautiful light blue damask print on the clearance rack at Home Fabrics for $4 and been saving it for something...I just didn't know what...until this unfortunate looking ottoman came into my life and made me realize that they would be a perfect match for each other.
So, after procrastinating for a few months, I started the process of recovering it one night a few weeks ago while watching a fine piece of cinematic art known as "Zombieland" (It was right before Dec. 21st, so Studly and I were getting some tips on what to do if the Mayans were right). As I was working on it, I ended up deciding not to tuft it (well, not so much decided, as I completely forgot to until I had 3 sides stapled tightly to the frame...). But, it looked pretty good without them, anyway.Then, I got to the corners and after fussing with them for almost an hour, I decided that at one in the morning I was in no mood to deal with their crap. I would work on it again the next day (which happened to mean 3 weeks later).
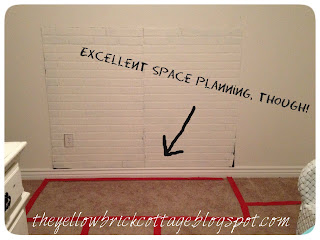
Anyway, when I saw it sitting in the corner of my bedroom this afternoon, I figured that I better get it finished up since I had a couple hours to kill. Oh, and then I changed my mind and decided I wanted to do the tufting after all, so I got to work removing staples off of one of the sides, so I would have room to pull the fabric tight after I was finished doing the tufting.
After I was through with that part, I grabbed the tufting buttons, left over fabric, upholstery needle and fishing line (it works just like upholstery thread, right?) and was ready to go. I thought it would be super easy to just snap fabric to the button after glancing at the pictures from the tutorial on that blog I read "in detail". It turns out that it wasn't so super easy. It was actually really hard and really frustrating! I could not believe how hard it was to tuck the fabric into the bottom of the cap part and then snap the base into it. After about a half hour of working on one button that just wouldn't cooperate, I took "Old Betty" out (my affectionately named glue gun) and just glued the fabric into place on the underside of the cap part. The bottom still wouldn't snap into it, so I figured I would just use hot glue on that, too. Why not? So, I proceeded to "finish" my fabric buttons via hot glue. Then, I grabbed some fishing line, and threaded it through the upholstery needle and the back of one of the buttons. I was feeling confident that I was finally in business.
After a few misses (two huge puncture holes that I'm really hoping won't be noticeable if I do ever finish it), I was able to find the hole in the base of the ottoman with my murder weapon 12 inch upholstery needle and started pulling the fishing line through it, pulling really tight to make the "dent" in the ottoman with the button, but I soon realized fishing line may not be the best type of thread to use when tufting an ottoman that is almost all foam, when I tied it and it disappeared back into the ottoman somewhere. Frustrated, I figured I would go to the fabric store in the morning and actually get some tufting twine to finish the job.
...and then I looked at the package containing the fabric buttons one more time:
Yes, I accidentally bought a REFILL pack AND it was a refill pack for only one part of the buttons! Apparently, there are 4 parts to a fabric button and they come in a KIT, which explains the issue I was having trying to assemble the damn things. Who knew? (probably about every other person who has ever done tufting.)
It appears that I need to learn to read before I run to the fabric store, tomorrow.


.jpg)

.jpg)